Sunday, July 29, 2012

Products I'm currently obsessed with


I have made some awesome discoveries of new-to-me products in the past few months that I've been wanting to tell y'all about, so I thought I'd put together one of those "stuff I'm currently obsessed with" posts. In this post, I'll be gushing about:

  • Bodycology's new Wild Poppy body product collection. ($3.69 per product at Walmart)
  • New York Color's Color Wheel powder mosaics in Pink Cheek Glow and Allover Bronze Glow ($3.99-$4.99--at Walmart, Target, CVS & Rite Aid)
  • Ecotools Finishing Kabuki brush ($6.00 at Walgreens)
  • Real Colors Hydra Lips Waterproof Gel Lip Liner in  Pinup Pink ($5.00 at Sally Beauty Supply)
  • Maybelline Eye Studio Lasting Drama Gel Liner in Blackest Black ($7.00-$10.00 at Walmart, Walgreens, Target, CVS, Rite Aid....)


Ok, so lets get this show on the road.


Bodycology Wild Poppy Fragrance Mist


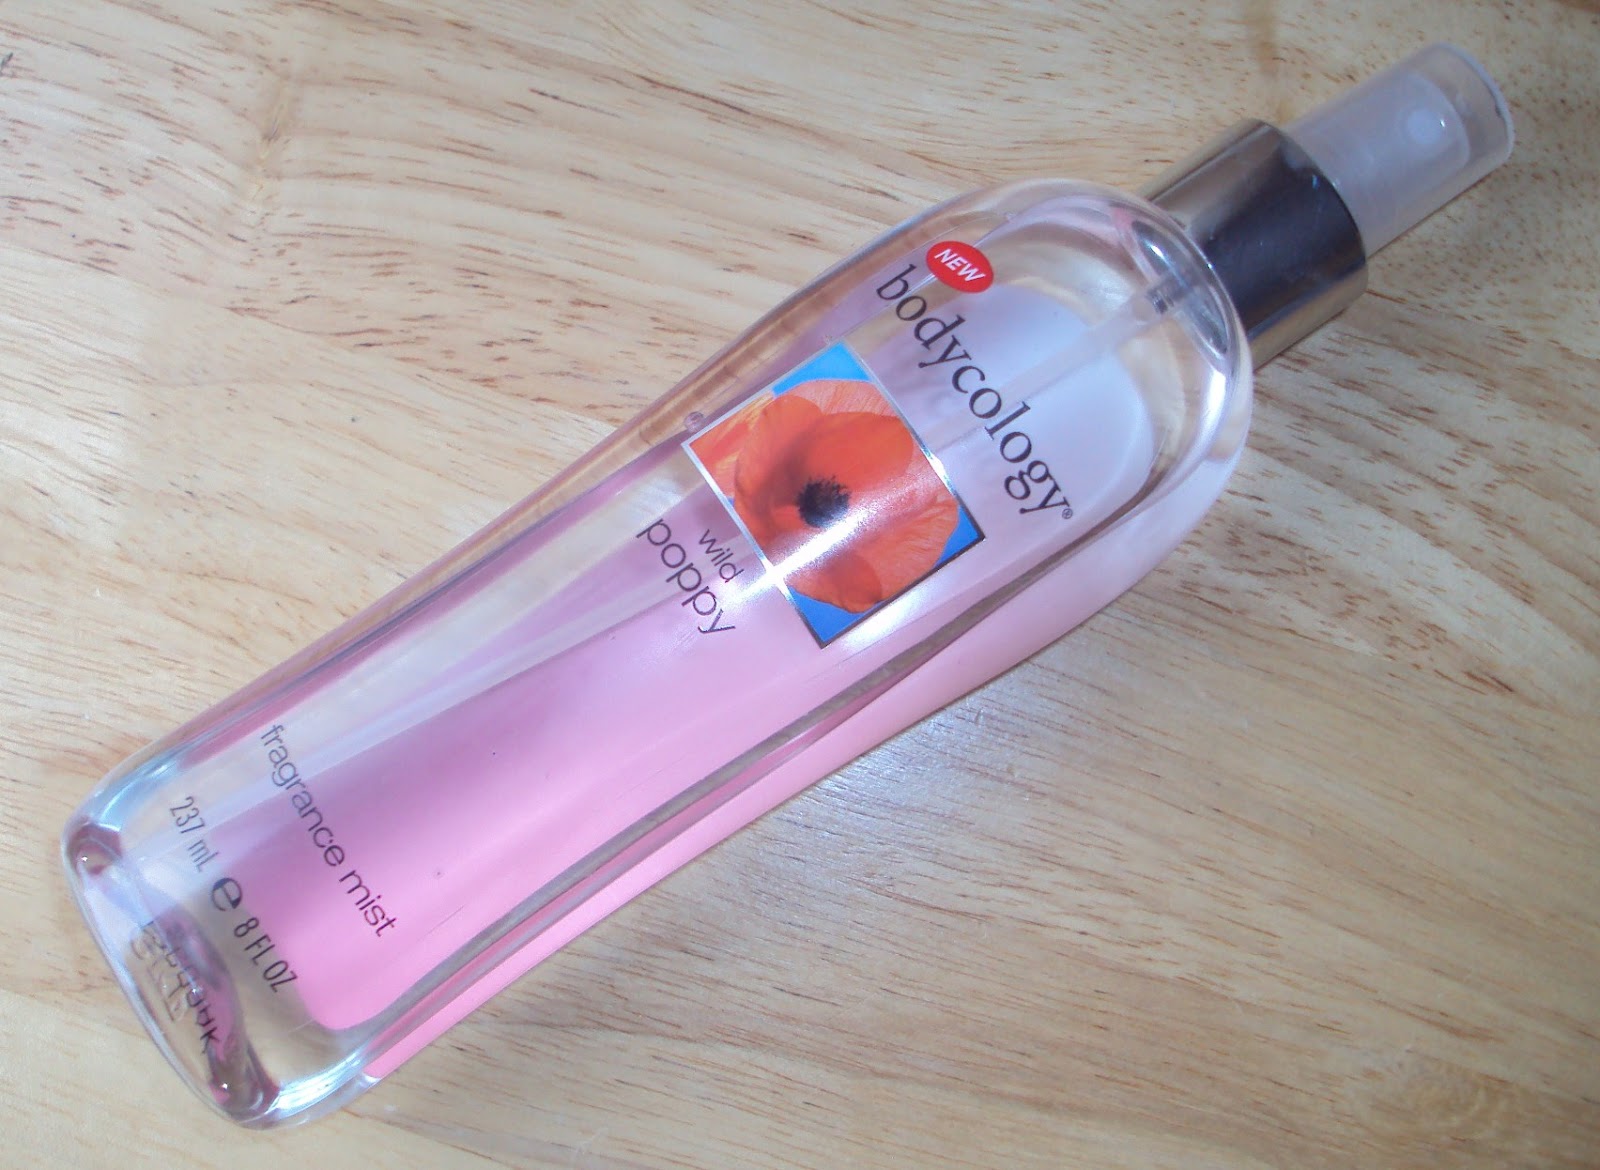
First up, Bodycology's new Wild Poppy body stuff. I have the fragrance photographed here because it is the fragrance I fell in love with first and that led me to buy the matching lotion and body wash and they are all awesome! I just happened upon this stuff one day while I was wasting money time in Walmart. I'm not usually one for smells. My signature fragrance for years has been Victoria's Secret Pink and I've been quite happy with that. But  I saw this and thought "hey I dig poppies" so I gave it a  sniff and--omg--LOVE! The bottle says "fresh scents of jasmine and rose transport you to a flower field on a spring day." Ok, I don't know why they site jasmine and rose scents for a fragrance called "poppy" but the rest is true! The scent is fresh and clean and bright and it has an energizing effect. It is precisely the kind of scent I go for (I hate anything too heavy or musky or spicy)!

Like I mentioned, I've been using the body wash and the lotion too and have been loving them as well.  Their scents are identical, the body wash lathers well and doesn't over-dry and the lotion is nice and creamy and sinks into the skin without leaving any nasty greasy feeling behind. And the price point is the best part of this stuff--a little over $3 for each product! Hooray for cheap, aromatherapeutic pampering! 


New York Color Color Wheel Powder Mosaics


All Over Bronze Glow


Pink Cheek Glow


(swatches of all makeup products at bottom of post)

Moving onto NYC's Color Wheels. OMG, how did I not discover these sooner??  Thanks be to CVS for printing me out an Xtra Care NYC coupon one day, because that is what sent me foraging for a new NYC product to try (don't you just love when you spend money JUST so you can use a coupon. Doesn't that defeat the purpose of saving??). I got the All Over Bronze Glow first and then later came back for the Pink Cheek Glow because I loved the bronzer so much. 

All Over Bronze Glow gives a gorgeous subtle sun-kissed look and it is NOT orangey and NOT full of crazy sparkles. It is nicely pigmented but not so overly pigmented that you end up with streaks on your face when you apply it and it blends out beautifully.

Pink Cheek Glow is a gorgeous warm peachy pink color--once again, no sparkles--just a pretty flush of color that brightens up your face. Pigmentation is nice and buildable and again the blendability is amazing. Both powders have a nice texture--fine-milled, not too chalky and not a ton of fall-out. I love when cheapie drugstore brands surprise me with their quality like this!


Ecotools Finishing Kabuki Brush


And what brush do I recommend for application of those awesome NYC Color Wheel powder mosaics?? Well, the Ecotools finishing kabuki brush of course! I thought I pretty much owned every Ecotools brush ever made but one day I spotted this in Walgreens and Ninja grabby hands commenced. I LOVE LOVE LOVE Ecotools brushes--each and every one of them. You are simply not going to find better, more well-made brushes at any price point in my opinion. They never shed, the hairs are cruelty free and lush but not too soft as to be totally ineffective and they're green AND cheap--what more can you ask for??

Though this brush is called a 'finishing kabuki,' I use it for blushes and bronzers. The sparser duo-fiber hairs pick up and apply color in a nice, soft, diffused way, leaving the skin looking subtly sunkissed or flushed and NOT over-painted or streaked with color. 


Maybelline Eye Studio Lasting Drama Gel Liner


Maybelline Eye Studio gel liner,  I apologize for leaving you out of my list of holy grail eye products for so long! I grabbed this liner one day when I was on my way out of town and realized I forgot my FORMER holy grail E.L.F. Studio cream liner. Let me just say this stuff BLOWS the E.L.F. liner out of the water. Pitch black, smooth, doesn't flake, doesn't transfer, hasn't dried out on me yet and even the little brush it comes with (pictured above) is good! I tend to consider "included" brushes garbage because they usually suck but this one has a nice point and you can get a good fine line or a thicker line depending on how you hold it. It makes the cat eye liner  look a cinch!

The one thing I have to say about this liner is DO NOT buy it in CVS or Walgreens. It is nearly $10.00 there. Buy it at Target or Walmart where it is nearly $4 cheaper!


Real Colors Hydra Lips Waterproof Gel Lip Liner


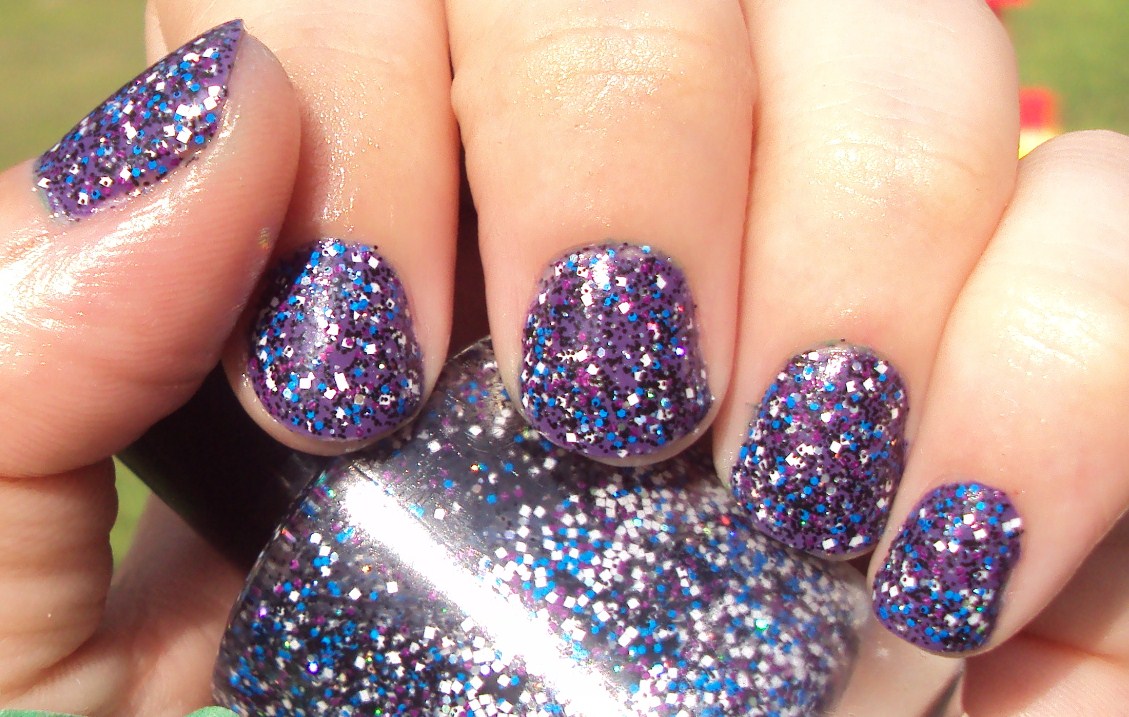
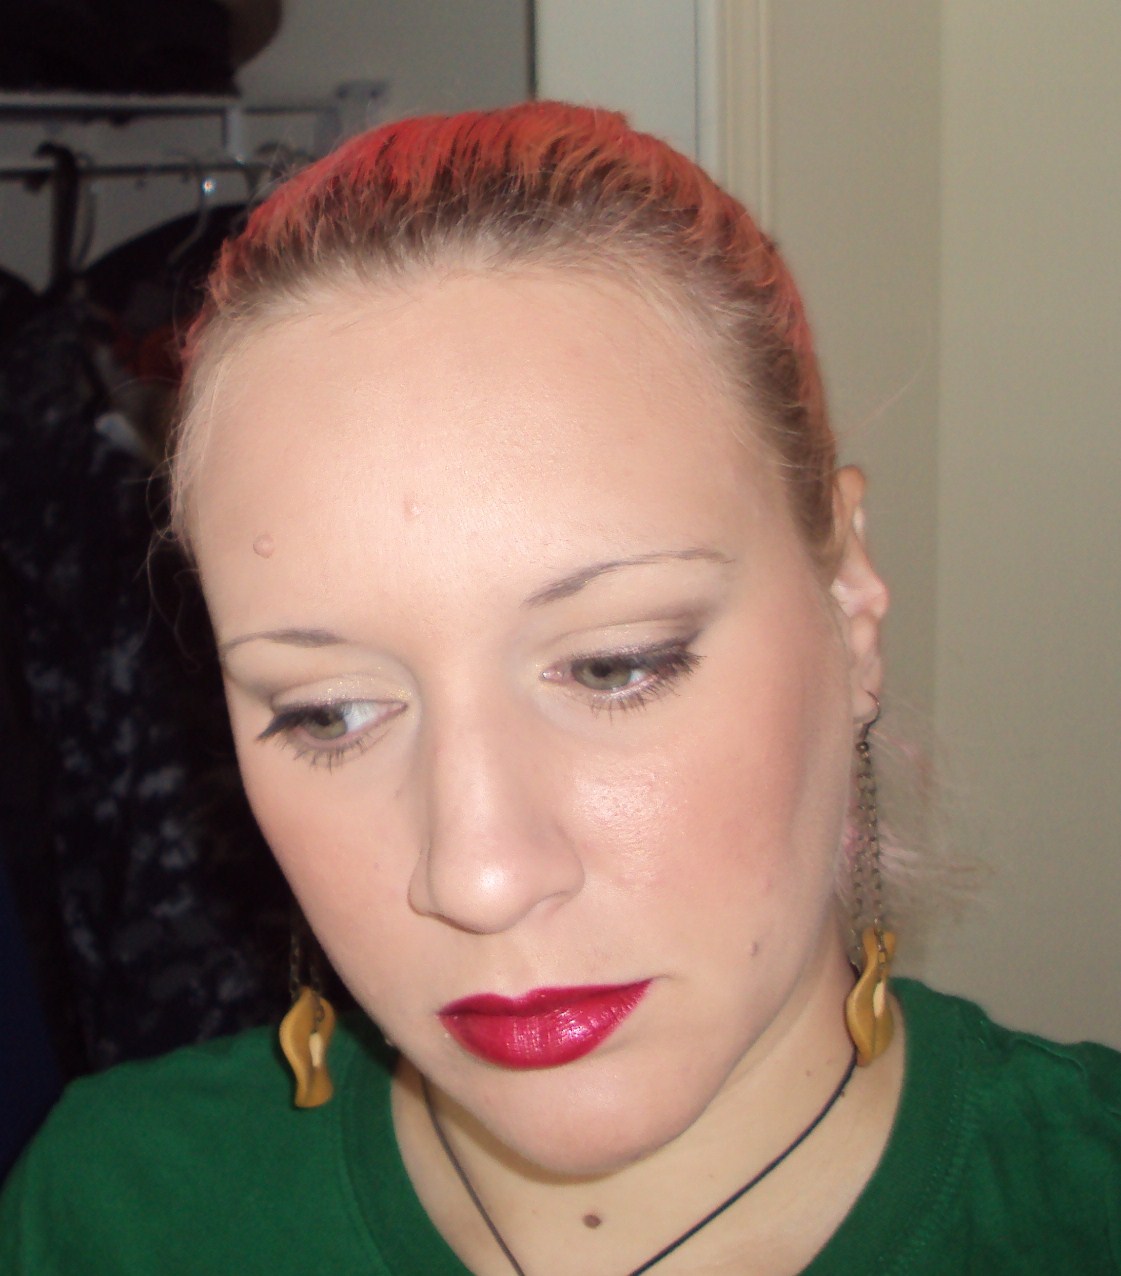
And we have come to the final product I've chosen to rave about today. What is this you ask? THIS is a TRUE hot pink lip liner--gasp! True bright pink lip liners are SO hard to come by--whether you are shopping high end or drugstore. I know NYX makes a few but I don't have easy access to NYX since NOBODY anywhere near me carries their products (sob!!). So one day, I was in Sally Beauty Supply checking out their makeup (they have some seriously under-rated makeup products in that store) and this little gem caught my eye. I was a little wary because it had the word 'gel' in it and I was afraid it would be too soft. I actually LIKE my lip liners slightly dry with just a touch of 'tug' to them. If they are too wet, then they're really nothing more than a seriously anorexic lipstick & they defeat the purpose of a lipliner, which is to define the lips and help lipstick last and stay put (read NO FEATHERING) by giving it a slightly sticky base to cling to. 

But this stuff is NOT just a lipstick masquerading as a pencil. It has a great consistency, it lasts, it keeps my lipstick from wearing off and feathering (I have always had issues with feathering even when I was a teenager...damn wrinkly ass lips) and it is a bright, slightly cool & blue based pink that goes perfectly with all the fuschia lipcolors I love! Instant holy grail status for me!


Product Swatches

indoor, no flash

indoor, flash

outdoor natural light

the 2 round spots are top to bottom: NYC Color Wheel Pink Cheek Glow and All Over Bronze Glow
and I think it is obvious which is the lip liner and which is the eye liner ;) 

Well, thanks for sticking with me! Somehow these posts always end up WAY wordier than I ever expected them to be. I never did know when to shut up...


Saturday, July 28, 2012

Fail Art of Olympic proportions.

Wanna see a terrible pic of some terrible Olympics inspired nail art?


I attempted to use a dotting tool to make Olympic rings (one big dot of color, and a smaller white dot in the middle to make the ring). Then, I had to make it worse by free-handing french tips onto this shizz. I would like them better if I hadn't chosen to do them on a diagonal. At first I thought the angle would look cool but now I'm thinking  it just looks like they're lopsided. 

OK, permit me a little rant, if you please...Ugh I am SO bad at free-handing stuff! When I first started playing around with polish, I thought maybe I'd have a leg up on nail art since I've done ART art forever and love it and have been told all my life that I'm talented but nail art is a whole other world! It's not just the tiny scale that poses a challenge, it's the nature of lacquer that really makes it difficult--the consistency, stuff drying on you while you're working on it and then balding & pulling, work-smearing top coats...and don't even get me started about trying to work with your non-dominant hand! Oh how I wish for ambidexterity or at least the ability to do SOMETHING with my left hand without it shaking!!

OK, rant over. Seriously, though. I have SO much respect for all the nail bloggers who do such beautiful free-hand nail art. It is truly one of the most challenging forms of art I've ever tried (and I've just about tried 'em ALL)...

Anyway, this mani consists of Wet N Wild French White creme, a bunch of LA Colors Art Deco striper polishes and Seche Vite top coat. 

Hopefully, by posting my fail art, I will encourage others out there to keep trying along with me. No one is instantly amazing at nail art. For every beautifully executed manicure, there are a zillion that look just like the one featured above. So let's all get our brushes and polishes back out and remember the old adage:  "If at first we don't succeed, try try again"...


Glitter Me Up Friday...on a Saturday...again


Better late, than never, right? Besides, I couldn't NOT post this beautiful polish! It's another indie glitter:  Space Mountain by F4. Let me tell you, F4's got it going on! If you haven't already, you MUST swing by their Etsy shop and check out all the pretties they have for sale!


(I thought this pic was funny. Yes that's Batman on my hand. It's a bandaid covering a booboo I got. It looks like he's flying up to snatch the bottle I'm holding. Why do I have Batman bandaids? Because I'm a mom of 3 little boys, that's why and you simply CANNOT find a bandaid in this house that doesnt have some kind of super hero or cartoon on it. It's all good though, cuz we all know Batman rocks...ok, random digression over)


Space Mountain is an awesome, fairly dense mix of white square, matte blue and violet hex, fine black and holo glitter in a clear base. This is one of 5 F4 polishes that I own and I absolutely love them ALL. Each one is packed with glitter and ALL the glitters come easily out of the bottle (no fishing for a certain size/shape/color) and spread out beautifully over the nail. I just love gorgeous, well behaved glitters! And the most remarkable thing is, despite the density of the glitters, all my F4 polishes dry amazingly smooth and they don't devour top coat like a lot of glitters tend to do. Just slick a coat of Seche Vite on top and you're done. 

The above swatches are 2 coats of Space Mountain over 2 coats of Catrice Purposely Purple, plus one coat of Seche Vite on top of it all. 

LOVE!! Speaking of love, go and show some to my GMUF sisters:

Kelly of Kelly's Kolors
Shaina of SG Nails


Friday, July 27, 2012

that $20 face I promised you

About a week ago, I wrote this post about my picks for the $20 face challenge that has been floating around beauty blogs. Well, I finally got around to doing a look for it and taking the pics. Here ya go (list of products and thoughts below pics):


(click to enlarge)


Products used: 

Wet N Wild Ultimate Sheer Tinted Moisturizer--$3.99
E.L.F. Studio Translucent Mattifying Powder--$3.00
E.L.F. Studio Contouring Blush and Bronzer Duo--$3.00
E.L.F. Essential Eye Primer (not pictured because my dumbass forgot to grab it when I took these pics)
E.L.F. Essential Eye Brightening Eyeshadow Quad in Butternut--$1.00
Jordana Best Lash Extreme Volumizing Mascara--$2.99 (this mascara is quickly becoming my new holy grail mascara. it works JUST as well as my beloved Maybelline The Falsies Flared mascara AND I like the Jordana brush better because it's slimmer and easier to work with!!) 
Wet N Wild Silk Lipstick in 552A/Just Garnet (I erroneously listed this as Cinnamon in my initial $20 post)--$.99
E.L.F. Studio Stippling Brush--$3.00
E.L.F. Essential Defining Eye Brush--$1.00


Translucent powder is on the left, blush/bronzer is on the right. Eyeshadow quad underneath

The translucent powder is really amazingly good for the price. However, it is not truly "translucent.' It does have a beige color to it. That beige color just happens to match my natural skin tone. I applied this powder using the included sponge by swiping the sponge over the powder and patting it onto my face. 

The blush/bronzer is SO amazing. The blush is a gorgeous peachy tone with amazing gold shimmer in it. It's rumored to be comparable to the iconic NARS Orgasm blush. I can't afford no NARS so I can neither confirm or deny this rumor. All I know is I love it for what it is! The bronzer is MEGA pigmented so you need to use a very light hand. I literally just barely touched the brush to it and then blew on the brush before applying. 

The Butternut eyeshadow quad is quickly becoming a holy grail item for me. You can create SO many easy neutral looks with this little one dollar wonder. The darkest shade also works as a gorgeous eyeliner when applied wet (which is what I did for this look).


The E.L.F. stippling brush (left) is something I use every day to apply my blush. It makes it super easy to apply and blend color without accidentally OVER applying. The eye defining brush is another staple in my every day makeup routine. This brush is SO versatile. When it is dry, it is fluffy enough to use to apply and all-over wash of color. The angled cut and the pointed end is awesome for outer V/crease work and when you wet this brush, its angle sharpens into a nice point that I took advantage of for this challenge. I managed to get a pretty good, clean wing with this little brush for this challenge. 


Wet N Wild $.99 lippie!! Who doesn't love a good, cheap red? This one has an almost metallic finish which I happen to love. And the formula is amazing. Smooth, easy to apply and super pigmented. The only thing I don't like about these lipsticks is Wet N Wild only prints the names on the outer seals. Once you buy the lipstick and remove the seal, you're only  left with the letter/number gobbledeegook on the bottom of the label and that can make it hard to pinpoint and remember shade names.

So whaddiya think of my $20 face? Pretty decent bang for my buck if I don't say so myself! 


Thursday, July 26, 2012

distressed stamped nails

I love the look of layered, distressed paint--where the top layer is worn away and you can see the underlying layer of color peeking out. I've been playing with ways to recreate that look on my nails (I'm sure there is probably a blogger out there who has already perfected this, but for some reason I decided to re-invent the wheel and try to figure it out all by myself)...

My experimentation has led me to double-painting my nails--one coat of color and then another coat of contrasting color on top of that. Then, using a fan brush dipped in acetone, I strip away the top layer just enough so the underlying color can be seen.

Anyway, so that was what I did to create today's mani. Then I stupidly stamped over my distressed polish WITHOUT taking a pic of what it looked like pre-stamp **head--desk**...observe:


(click to enlarge)


So anyway, here's all that I used to create this mani:


I started out with 2 coats of a no-name L.A. Colors lime green creme (it came as part of a 6 or 7 bottle "brights" set that I found at TJ Maxx sometime last year. Then I laid down a coat of Sally Hansen Insta-dri Blue By (a summer 2012 LE shade that I recently found in my Walgreens clearance bin). After that, I poured a capful of pure acetone, dipped my fan brush in it and stroked it across the blue polish until the green was visible in places again. Of course, I can't live without some kind of glitter in my mani, so I added a coat of Pure Ice Rescue Me, an awesome translucent lime green jelly polish with this killer duo chrome green/blue glitter in it that just GLOW (speaking of which, this polish actually does glow in the dark and it is BRIGHT too--but I was more interested in the tint and the glitter this time)...all that got a coat of Seche Vite.

While I was waiting for the Seche Vite to work its magic, I suddenly go the itch to stamp, so I busted out my BM 208 plate and my Konad Special white polish and used the 2 shattered images--ya know, shattered...distressed...I figured it goes with the whole deconstructed look of all this. And don't get me wrong, I like the stamping...I just am kicking myself for completely forgetting to get a pic of my nails before I stamped...oh well...

I'll be doing other manis like this soon. Maybe I'll even do something crazy like post a tutorial, if you're interested, of course...

So have you done any nail art experimentation lately?


Wednesday, July 25, 2012

more giant glitter nails!

I have another Polish All The Nails inspired glitter mosaic mani for you today and it is so bling-tastic, it was very hard to photograph:


I am seriously loving playing with these big glitter pieces. Thank you Polish All the Nails  for planting this obsession idea in my head! I love how shiny this mani is--like mirror balls on your nails! Plus, the glitters stay nice and flat with a good coat of Gelous, so there's no stuff sticking up from my nails to get caught on things and annoy me all day.

This mani consists of:

2 coats of Sally Hansen Complete Salon Manicure in Sky's the Limit (one of the LE Spring Tracy Reese  shades I picked up on clearance recently at my Walgreens), a coat of Gelous, lots of awesome gold glitter and another coat of Gelous. I apologize for the bubbles. My Gelous is getting down to the last third or so in the bottle and it's getting pretty thick...

Here's a bonus pic of the tiny vials my glitters came in. I frickin LOVE tiny things:

so cute!


Update on Sinful-gate 2012: Revlon has made a statement on their Facebook page

Looks like Revlon is responding to customers' demands and is attempting to resolve the issue of Sinful's blogger photo-theft. Check out what the company posted on its Facebook page. Let's hope they do right by the bloggers.


(Sinful has recently become a subsidiary of Revlon, which is why they were called upon to address Sinful's theft of blogger manicure photos)...


The internet truly is a powerful thing, isn't it? It's nice to see that power doing some good by amplifying the voices calling for a wrong to be righted and providing a public forum where those voices can be heard and echoed. Rock on to all who took a stand and let Revlon and Sinful know just how wrong their company's actions were & that those actions would NOT be tolerated.

btw, I promise I'm going to do a post with pics before the sun goes down today!

Quick comment update

I've unfortunately had to change my blog's settings so I have to approve comments before they are posted. I liked having things open but, you know, sometimes you gotta protect yourself against people who want to spam your blog or who might not be feeling what you post from one day to the next or who, for some unknown reason, just don't like you. 

One good thing about me having to approve comments is that now I know I won't accidentally miss any posted comments (which sometimes happens if a comment gets posted to one of my stand-alone pages or to an older post)...

Hope y'all understand! Sorry for having to put an extra step in the way of communication :(

Tuesday, July 24, 2012

So here I am doing post after post about how awesome Sinful polishes are, and then I read THIS

This truly does pain me to write because I have LOVED Sinful Colors for years. Some of the oldest polishes in my stash are Sinful shades that have been with me since I was a teen. I have more Sinfuls than I have any other drugstore polish in my collection...BUT...I can't be quiet about this:

Apparently, Sinful has flat out stolen pictures from 2 different nail bloggers and published them in a pamphlet they are featuring in Walgreens stores as a marketing ploy. All blogger watermarks were removed from the images and no credit was given anywhere in the pamphlet for any of the photos.

You can read all about the thievery here:

http://www.swatchandlearn.com/blog-news-sinful-colors-used-my-photos-in-their-pamphlet-without-permission-distributed-it-in-walgreens/

http://the-swatchaholic.com/?p=6081

http://www.reddit.com/r/RedditLaqueristas/comments/x2nrq/sinful_colors_steals_bloggers_images/

http://www.buzzfeed.com/lauram48/sinful-colors-steals-from-bloggers-6wjl

Frickin unbelievable!!

This is vile to me for several reasons:


  • Last time I checked, stealing is WRONG. Read the frickin 10 commandments, polish execs!
  • Nail bloggers work hard taking pics, editing pics, writing and posting and maintaining their blogs and they do it simply because they LOVE nail polish and want to share their passion with others. Nail blog posts are FREE advertisements for whatever polish companies they happen to be talking about in any given post. It is absolutely disgusting to think a polish company would take advantage of a blogger's love and labor like that!
  • Sinful, being a big polish company owned by Revlon, could surely afford to PAY for photos instead of stealing them from unsuspecting bloggers.
  • They didn't even steal pics that featured their polishes OR the nail art techniques they're describing. Way to lie to and mislead your customers, Sinful!!
  • Imagine how awesome it would have been for those bloggers if Sinful had reached out to them, asked permission to publish their photos and credited them with their work. I know if I was ever contacted by a big polish brand and asked to use my blog's photos in a national marketing campaign, I would be over the frickin moon! What a huge impact that would have on readership and exposure for a blog! 
So are you as pissed as I am?? Feel free to go tell Sinful on their Facebook page! Demand that they destroy all those pamphlets and apologize to the bloggers that they stole from! 

If you are a nail blogger, blog about Sinful's blatant photo theft. Let people know that you stand behind fellow nail bloggers and that we, as a whole, refuse to be taken advantage of by any company!

As of right now, I have 63 bottles of Sinful polishes destined to leave my possession if the company doesn't apologize. Sinful, PLEASE apologize to those bloggers and pull all those pamphlets from every Walgreens across the country! If you don't, then I can't continue to support your brand any longer.

UPDATE: The Swatchaholic  updated her post to say that Sinful even photoshopped her nail beds and manicure onto the cardboard display model's hands!!! Seriously?!?!

MOAR Sinful pics--Cross My Heart with a mosaic glitter accent nail

A while back, I discovered this awesome nail blog called Polish All The Nails. She had several posts that featured this awesome nail art technique she calls Glitter Mosaics, that involves taking larger pieces of glitter and adhering them to the nails. We all know my obsession for sticking things to my nails and what better to stick than huge glitter?? So I promptly ordered me a 12 pot set of huge glitter on Ebay and today, I finally got a chance to play with it.


I chose to do a mani of Sinful Colors Cross My Heart (yea, guess who hauled 13 new Sinfuls at the $.99 sale...oopsy) and just do a glitter mosaic accent nail. I used my Mash nail art tweezers to pick up and place the glitters (which are translucent yellow iridescent hexes) onto a wet coat of Gelous. My placement is no where near as awesome and precise as Ms. PolishAlltheNails' is, of course...After I placed each glitter, I applied another coat of Gelous to smooth everything out. 

Cross My Heart is a red-orange jelly polish and it is just so bright and saturated and juicy looking. Because I have some pretty nasty blue staining on my nails, I started with a base coat of white polish (Wet N Wild French White Cream), followed by 2 coats of Cross My Heart. The white base minimized the jelly squishiness but amped up the brightness of this polish, so I guess it was an even trade. 

Expect to see more glitter mosaic madness from me soon!


NOTD: Sinful Colors UFO over Luminary

$.99 Sinful sale fever!! I forgot about these pics I still had on my camera. Here's Sinful Luminary and UFO hanging together. 


As I mentioned in my last post, Luminary is a Orangey Coral polish with silver shimmer particles in it. UFO is an iridescent glitter in a sheer orange jelly base. And I personally think they look smashing together!

The above swatches are 2 coats of Luminary + 2 coats of UFO + one coat of Seche Vite. I'm not sure if either of these colors are readily available right now as Luminary may have been part of an LE spring release and UFO is supposedly discontinued now and hard to find. HOWEVER, retailers are known for shoving unsold LE & discontinued shades into other newer displays and even hiding them in the back of the core displays--and this seems to happen especially with Sinfuls in my experience. I cannot even count how many times I have found random LE shades shoved into the core display--so really scour your store shelves. You never know what gem might be waiting for your discovery. 


Monday, July 23, 2012

Yep, I swatched every last Sinful polish that I own (standby for obscenely PIC HEAVY post)


Unless you live under a rock, you've probably heard that Sinful Colors polishes are on sale this week for $.99 a pop at Walgreens. As such, I thought it would be appropriate to swatch my entire 50 bottle Sinful collection. What's the sense in having a massive polish collection if you don't use it for the good of other penny-pinching lacquerheads out there perusing the interwebz trying to figure out exactly which Sinfuls to haul? I'm just doing my duty here people, no need to thank me.

I apologize that these swatches are on nail wheels and not actual living finger tips...I'm sure you can imagine the hours of difficulty involved in trying to swatch such a redonk amount of colors on real hands. Me, my family and my cuticles thank you for your understanding.

OK, on to the swatches (all are sans topcoat):


(click pic to enlarge)
Left to right: Easy Going; Social Ladder; You Just Wait; Pinky Glitter 

Easy Going = light pink creme. 3 coats to opacity
Social Ladder = pinkish nude glass-fleck semi-sheer polish.  3 coats still leaves it slightly translucent.
You Just Wait = lavender/pink/lime multi-chrome polish. 4 coats to opacity. looks killer layered over darker colors. 
Pinky Glitter = iridescent small hex glitter and silver micro glitter in pink-tinted jelly base. 3 coats used in above swatch. Best worn as layering polish.


left to right: Island Coral; Pink Forever; 24/7; Cream Pink

Island Coral = Warm Coral Pink Cream. 2 coats to opacity.
Pink Forever = cool-toned rose pink cream. 2 coats to opacity.
24/7 = bright neon pink. 3 coats to opacity. dries to matte finish.
Cream Pink = medium pink with golden shimmer. 2 coats to opacity

left = Dare Devil
right = Forget Now

Dare Devil = Fuschia secret shimmer polish with slight blue flash. Also shown. 2 coats to opacity. 
Forget Now = magenta glass fleck. 3 coats to opacity.

11 = Dream On
12 = Frenzy

Dream On = Neon purple. 3 coats to opacity. Dries Matte
Frenzy = teal and violet fine glitter polish. 3 coats shown above. best for layering.

13 = Purple Diamond; 14 = Winterberry; 15 = Lavender; 16 = Daddy's Girl

Purple Diamond = light purple shimmer/glass fleck polish with slight gold flash. 3 coats to opacity
Winterberry = dusty grey-leaning purple shimmer polish. 2 coats to opacity
Lavender = dusty light purple (heavily blue leaning) creme. 2 coats to opacity. Also shown 
Daddy's Girl = Blurple jelly with coppery/violet duo-chrome glitter flakes. 3 coats to opacity


17 = Sugar Sugar; 18 = Mercury Rising

Sugar Sugar = deep red glass fleck. 3 coats to opacity
Mercury Rising = deep burgundy with coppery glass flecks. 3 coats to opacity

L to R: Luminary; Cloud 9; UFO; Serena & Chloe

Luminary = glass fleck coral. 2 coats to opacity
Cloud 9 = yellow-leaning orange shimmer. 2 coats to opacity.
UFO = large iridescent hex glitters and pale gold micro-glitter in sheer orange jelly base. 3 coats shown above. Best as a layering polish.
Serena & Chloe = large particle red-leaning orange shimmer. Heavy on the orange and gold flecks. 3 coats to opacity.


L to R: All About You; Paris; Pull Over; Neon Melon

All About You: super fine orangey gold glitter. 3 coats shown above. Possible opacity at 4. 
Paris: light gold fine glitter polish. 3 coats shown above. Best as a layering polish.
Pull Over: Orangey yellow jelly polish. 3 coats to opacity.
Neon Melon: hi-lighter yellow neon. Dries to matte finish. 4 coats shown above and still somewhat sheer. 


L to R: What's Your Name; Secret Admirer; Slate

What's Your Name = sheer black base with teal/violet duochrome glitter. Glitter looks mostly teal when on the nail. 3 coats to opacity.
Secret Admirer = sheer black base with heavy charcoal shimmer. 3 coats to opacity.
Slate = deep gray shimmer. 2 coats to opacity.

L to R: Queen of Beauty; Seaweed; White Diamond

Queen of Beauty: fine silver glitter in clear base. 3 coats shown above. best as a layering polish.
Seaweed: green-leaning gray/khaki creme. 2 coats to opacity.
White Diamond: sheer white shimmer polish with green and violet micro-flakes. 3 coats shown above and still sheer. best as a layering polish.


L to R: Mint Apple; Leap Flog; Envy; Exotic Green

Mint Apple = mint green creme with silver shimmer. 2 coats to opacity.
Leap Flog = dusty pine green, blue-leaning creme. 2 coats to opacity.
Envy = Kelly green creme. 2 coats to opacity
Exotic Green = yellow-leaning green creme. 2 coats to opacity

5 = Show Me The Way; 6 = San Francisco; 7 = Call You Later; 8 = Irish Green.

Show Me the Way = yellow-leanig green jelly with gold and kelly green shimmer
San Francisco = Emerald green shimmer
Call You Later = green hex glitter and gold and green fine shimmer in clear base. 3 coats shown. best as a layering polish.
Irish Green = neon green jelly.  dries to matte finish. 3 coats to opacity.


L to R: Cinderella; Sweet Dreams; Love Nails; Ocean Side; Rain Storm

Cinderella = pastel teal base with pink and lavender shimmer particles. 3 coats to opacity
Sweet Dreams = sky blue polish with silver shimmer. 2 coats to opacity
Love Nails = Teal blue shimmer with slight violet flash. 3 coats to opacity
Ocean Side = slightly dusty teal creme. 1 coat to opacity.
Rain storm = dusty blue creme. 2 coats to opacity

15 = Ciao Bella; 16 = Neptune;  17= Hottie; 18 = Nail Junkie

Ciao Bella = cobalt blue glass fleck. 2 coats to opacity
Neptune = lavender-leaning blue with silver shimmer. 2 coats to opacity
Hottie = iridescent hex glitter and shimmer in a sheer blue jelly base. 3 coats shown. best as layering polish.
Nail Junkie = iridescent hex glitter and shimmer in a sheer teal jelly base. 3 coats shown above. best as layering polish. 


 Bottle shots: 


Mint Apple; Leap Flog; Envy; Exotic Green

Show Me The Way; San Francisco; Call You Later; Irish Green; Green Ocean

Cinderella; Sweet Dreams; Love Nails; Ocean Side

Rain Storm; Ciao Bella; Neptune; Hottie; Nail Junkie

Luminary; Cloud 9; UFO; Serena & Chloe

All About You; Paris; Pull Over; Neon Melon

What's Your Name; Secret Admirer; Slate; Queen of Beauty

Seaweed; White Diamond

Easy Going; Social Ladder; Just You Wait; Pinky Glitter

Coral Island; Pink Forever; 24/7; Cream Pink

Dare Devil; Forget Now

Dream On; Frenzy; Purple Diamond; Winterberry

Lavender; Daddy's Girl; Sugar Sugar; Mercury Rising

Good God that's alot of polish...